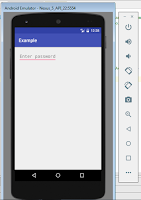
 Before starting chapter 3. I hope you have read basic set up ANDROID FOR BEGINNER CHAPTER 2 : INTRODUCTION OF BASIC UI COMPONENTS . Here we will just focus on basic about TextView only. Android system provides us TextView, from where we can display text into the screen. Although it contains text editing operations, the basic class does not allow editing, so EditText class is provided for this reason.
 Step 1 : Edit activity_main.xml
Before adding textview in xml
<?xml version="1.0" encoding="utf-8"?>
<RelativeLayout
    xmlns:android="http://schemas.android.com/apk/res/android"
    xmlns:tools="http://schemas.android.com/tools"
    android:layout_width="match_parent"
    android:layout_height="match_parent"
    android:paddingLeft="@dimen/activity_horizontal_margin"
    android:paddingRight="@dimen/activity_horizontal_margin"
    android:paddingTop="@dimen/activity_vertical_margin"
    android:paddingBottom="@dimen/activity_vertical_margin"
    tools:context="app.androidlad.iamandroidbeginner.MainActivity">

</RelativeLayout>
After adding textview in xml
<?xml version="1.0" encoding="utf-8"?>
<RelativeLayout
    xmlns:android="http://schemas.android.com/apk/res/android"
    xmlns:tools="http://schemas.android.com/tools"
    android:layout_width="match_parent"
    android:layout_height="match_parent"
    android:paddingLeft="@dimen/activity_horizontal_margin"
    android:paddingRight="@dimen/activity_horizontal_margin"
    android:paddingTop="@dimen/activity_vertical_margin"
    android:paddingBottom="@dimen/activity_vertical_margin"
    tools:context="app.androidlad.iamandroidbeginner.MainActivity">

    <TextView
        android:text="Hello World!"
        android:layout_width="wrap_content"
        android:layout_height="wrap_content" />
</RelativeLayout>
Step 2 : add activity_main.xml to MainActivity.java
Now add activity_main.xml to MainActivity.java so that you can see that in you device.
Now run your code from upper tools there would be a button called Run select device and see the result.
 |
| Hello Word |
Step 3: Now try other attributes of TextView
: defines the text that would be displayed on the screen.
: sets the style of the text. The possible choices are bold, italic and normal.
: specifies the font family for the text.
: as you can imagine it defines the typeface for the text. The possible values are normal, sans, serif and monospace.
: defines the size of the text. It is recommended to use for the size.
: sets the color of the text. The color has to be defined in hex encoding or as a reference to another resource.
: sets the background color of the text. Again the color should be defined in hex encoding or as a reference to another resource.
: defines the color when the text is marked as highlighted.
: indicates whether the text can be selected (true) or not (false). This attribute can be used in order to allow copy-paste controls.
: defines the exact height of the in lines.
: indicates if the view reacts to click events.
: identifies the links into the text and converts them into clickable ones. The available choices are web, email, phone, map or all of them.
Please give me your feedback in comment box so that I can do more hard work for making his more easier to understand.
ConversionConversion EmoticonEmoticon